
Rules contents
Learn to Play
The Rules
Reference
The Rules · Phase 3
Combat Phase
Steel meets steel. Every melee on the battlefield is fought out, the losers test their nerve, and broken units run for their lives.
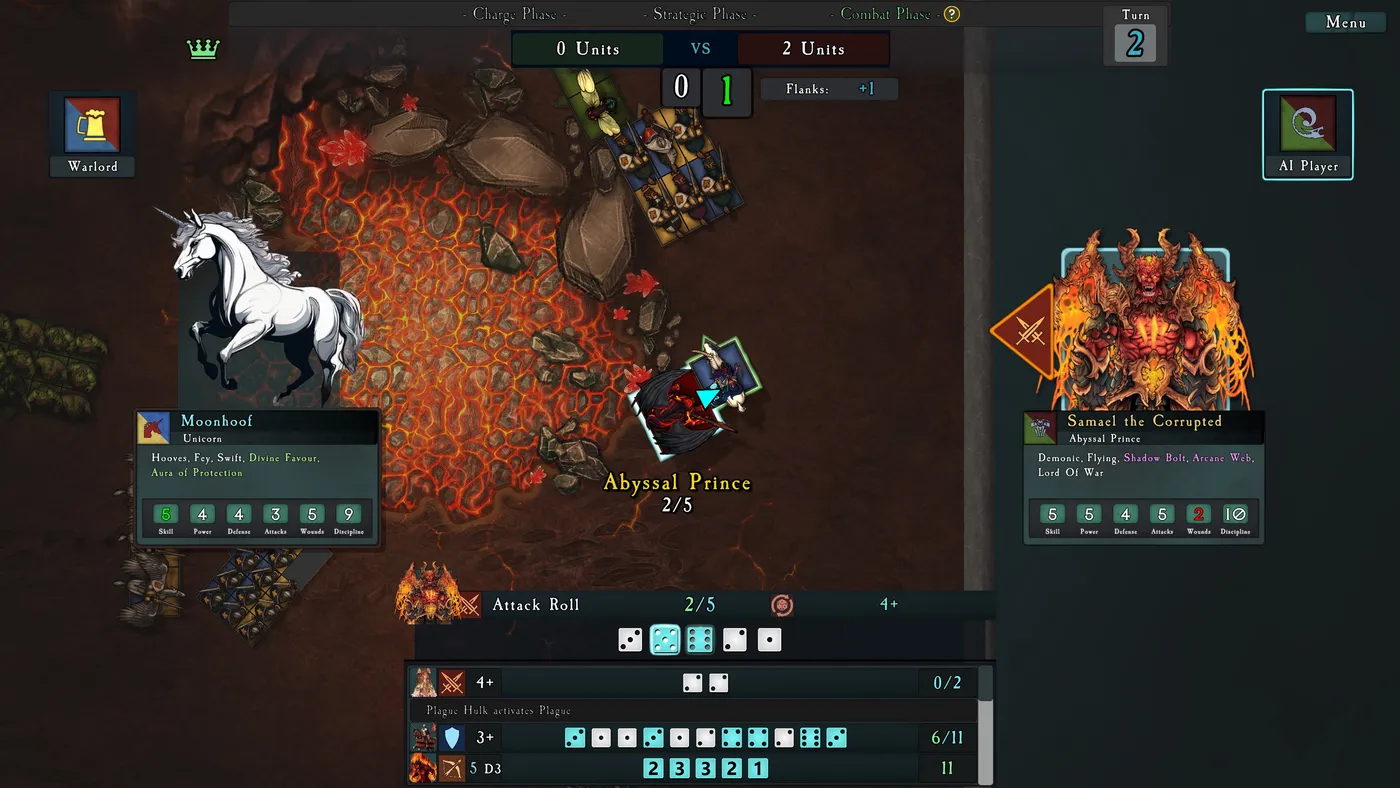
The Combat phase needs no decisions. Every unit in combat fights automatically, and the game shows each roll as it happens. Your decisions were made earlier: which charges to declare, which side to hit, how wide and deep to build each unit. This page explains what happens next.
Engagements
Units in contact with each other form an engagement. Most engagements are one unit against one unit. When a third unit charges in, all of them belong to the same engagement and fight it out together. Each engagement is fought separately, one after the other:
- Attack Every unit attacks at the same time: attack rolls, then damage saves. Casualties are only removed after everyone has attacked, so models killed this round still strike back.
- Combat score Each side adds up its combat score. The higher score wins the engagement.
- Break tests Every unit on the losing side takes a break test. Units that fail flee.
Units stay locked in combat, round after round, until one side is destroyed or breaks. A unit in combat can’t move in the Strategic phase.
Who attacks
Which models fight depends on which side of the unit the enemy is touching:
- Front
- Every model in the front rank attacks, rolling dice equal to its Attacks. Each model in the second rank adds one supporting attack, whatever its Attacks stat.
- Flank
- Every model along the engaged flank attacks with its full Attacks. There are no supporting attacks to the flank.
- Rear
- Nobody attacks. A unit caught in the rear can only hope its friends help.
- Each model attacks once per round. A model on a corner fights to its front if it can, otherwise to its flank.
- Units with Spear and Shield also get supporting attacks from the third rank, unless they have a charge bonus that round.
- Models with 0 Attacks make no supporting attacks either.
- Lance Cavalry in a narrow wedge, fewer than four models wide, also fight with both flank files at full Attacks. A narrow lance hits harder than its frontage suggests.
Attack roll
Compare the attacker’s Skill with the defender’s:
| Attacker’s Skill is… | To hit |
|---|---|
| Higher than the defender’s | 3+ |
| Equal to or lower than the defender’s | 4+ |
Abilities can add or subtract from the roll, but it is never worse than 6+ or better than 2+. Some let you re-roll misses or 1s, and some force enemies to re-roll their hits.
Damage save
For every hit, the defender rolls a damage save. Compare the attacker’s Power with the defender’s Defense:
| Power compared with Defense | Save on |
|---|---|
| Power is 3 or more higher | 6+ |
| Power is 1–2 higher | 5+ |
| Power equals Defense | 4+ |
| Defense is 1–2 higher | 3+ |
| Defense is 3 or more higher | 2+ |
Each failed save is one wound. Wounds are pooled across the unit, and a model is removed each time the pool reaches its Wounds stat (see Wounds and casualties).
- A Halberd means enemy saves against it in melee are never better than 4+.
- Poisoned Attacks make the defender re-roll saves of 6.
- Lethal Strikes deal two wounds per failed save to models with more than one Wound.
Commanders in combat
A commander fights alongside its unit, but separately. It attacks with its own Skill, Power and Attacks, against one enemy it’s in contact with. It fights to the front or a flank, and to the rear only if its unit is a single rank deep.
- When both sides of a fight have a commander, the commanders duel. They attack each other, not the troops.
- Enemy rank-and-file never attack a commander inside a unit. A commander only takes wounds from an enemy commander, or once its retinue is gone. Wounds that are left over after the last model of the retinue dies carry over to the commander.
- A commander riding a monster or chariot fights as part of its mount.
Combat score
Once all attacks are made, each side adds up its combat score:
| Source | Score |
|---|---|
| Wounds caused, including any wounds beyond what was needed to kill | +1 each |
| Flank: for each of your units in contact with an enemy’s flank | +1 |
| Rear: for each of your units in contact with an enemy’s rear | +1 |
| Ranks: for each of your units that isn’t disrupted, +1 for a second rank and +1 for a third | up to +2 |
| Banners and abilities, such as a War Banner | as listed |
A unit is disrupted if any enemy touches its flank or rear, or if it is fighting more than one enemy unit. A disrupted unit gets no rank bonus to combat score. This is why flank charges are so strong: they add +1 for you and take up to 2 away from the enemy.
The side with the higher total wins. If the totals are equal, nobody tests and the fight carries on next turn.
Break tests
Every unit on the losing side takes a break test: a Discipline test with a penalty equal to the difference in combat score.
Pass on 2d6 ≤ Discipline + ranks − score difference
- A unit with a living commander uses the commander’s Discipline.
- Fearless units ignore the score difference.
- Reanimated, Demonic and Construct units never take a break test. Instead they crumble, losing D3 wounds.
Fleeing
A unit that fails its break test flees at once. It turns and runs its full Move directly away from the enemy it was fighting.
It doesn’t get away if:
- it was surrounded, with enemies on opposite sides (front and rear, or both flanks);
- its Move is less than 1”;
- it runs off the edge of the battlefield.
In any of these cases it is destroyed instead.
The winners don’t pursue. A unit with no enemies left in contact is free again next turn. A unit still in contact with a single enemy on its flank or rear turns to face it, ready for the next round.
A fleeing unit keeps running in the Strategic phase unless it rallies. See Rallying fleeing units.
Charge bonuses
Weapon charge bonuses and other “first round” effects such as Frenzy apply only in the first round of combat after a charge. After that round, a combat is a straight slog.